Our decorations would be up before the end of November if it wasn't for a certain Small Person being born on 29th November. The rule is: Decorations can't go up for Christmas until she has celebrated her birthday, so the Sunday after her party is always the day to Deck the Halls!

Anyway, Christmas fast approaching, we have started the festive crafts at toddler group.
To make a paper plate angel you will need:
- a paper plate
- glue
- a doily
- glitter
- various bits of silver/white/gold collage pieces (we have used lace, foil including a foil milk bottle cap, doily, sweet wrappers and wrapping)
- pens/pencils
- scissors
- sellotape

Next, drawn a circle about 2" in diameter over the centre dot. This is easiest to do with a compass, but if you dont have one to hand (like me) just find something round to draw around about the right size and guage roughly where to place it so it is central. It will not matter if you are off by a little bit.

Cut along your straight line from the edge of the plate up to the edge of the drawn circle.

Cut around the centre circle from the line leaving a small piece (about 1cm) uncut directly opposite your straight line.

Turn the plate over so that the base is facing up. Draw your angels face, using the pens or pencils, on the centre circle. The bottom of the face is the part that was left uncut.
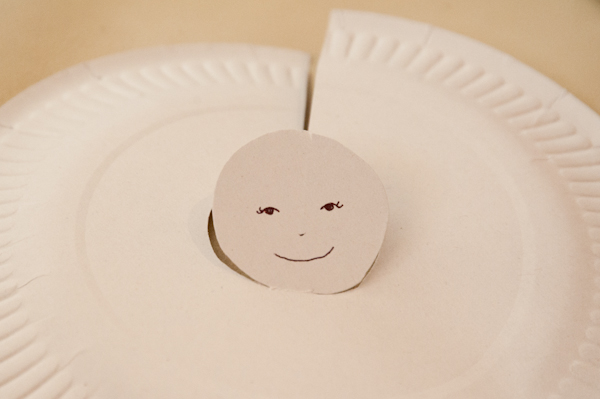
Pull the edges of the straight line cut across each other to form a cone shape with the centre circle (face) sticking up. Tape to hold. (I did trim some of the excess overlap off mine, but it really doesn't matter if you do or not).


Now for the fun part - decorate with all of your collage bits and pieces and glitter. We used a foil milk bottle lid for a halo, and lace as a sort of shawl.

Now take your doily and cut a section of it to create the wings. This really depends on the kid of look you want and the size of the doilies you are using. Our doily was small, so we cut it in half.
Down the centre back put a line of glue to stick your doily wings to.

All finished!
This will fit on top of the tree, can stand alone, or if you like, you can thread a loop through the top of the head of the angel so that you can hang it. Another idea would be to have each halo or a scroll label in front with people's names for fun place settings on Christmas day
You could use other things like feathers (these would be great for wings) tissue paper, wool (great for hair) and all sorts. Perhaps you would like to make a rustic angel? Use parcel paper, string, raffia, hessian, scraps of calico and maybe even a few sticks for arms. Skeleton leaves would make a great substitute for the doily wings (but would be very delicate!). Please leave a comment if you have made or would like to make one of these, especially if you have any extra ideas for variations.
You might also be interested in the Pine Cone Angels tree decorations from a past year. Happy crafting!
No comments:
Post a Comment